FlickRocket offers a number of ways to distribute secure digital content including selling and renting products from your own storefront, subscription services, redemption codes, apps and plug-ins for third-party platforms, custom API integrations, and by email invitation. Along with these options is another powerful feature that can quickly and efficiently get a lot of content to many users. That feature is Access Groups.
An Access Group is a virtual group of digital products that can be accessed by members of that group. A group can contain one product or thousands of products and products can be added or removed from a group at any time.
Users or “Members” of a group have Digital Rights Management (DRM) license-controlled access the content in that group based on a combination of usage rights set for that member, product, and group.
Access Groups allow quick and easy access to selected content while still maintaining licensed control of who and how your intellectual property is used. That content can include audio, video, PDF, ePub, SCORM, and HTML-based products and access to those products can be dynamically controlled or "dripped" to a member at specific dates.
Although it is possible to sell group memberships as a product in your shop, using Access Groups does not require a storefront. The Access Groups feature works as a stand-alone content distribution option and you can add members manually, via unlock codes, self-signup, list import, and with an Outlook add-in.
One reason to use Access Groups is to offer a larger number of products at a reduced cost to you, but there are many other reasons including:
You want to provide access to all employees of a company, distributors, or service contractors.
You have a list of donors or sponsors to whom you want to grant access.
You want to provide bloggers or reviewers with time-limited, advance access.
You want to provide access to content that will or may change during membership.
You want to provide access to content without requiring the member to pay for it or having to use gift certificates or redemption codes.
You want to give members - all or limited to certain email domain(s) - quick and free access via self-signup.
You want to allow an organization to self-manage members.
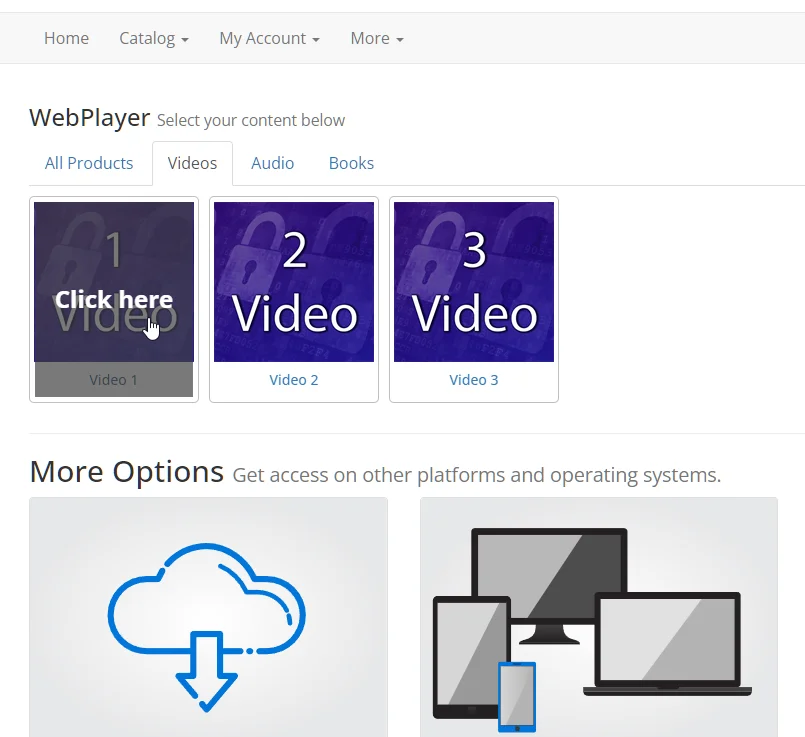
Group members access all content assigned to the group via the secure players (apps or web-based).
The Web Player, a browser-based player, does not require any installation and works with modern browsers including Chrome, Firefox, Edge, and Safari. Members can access the group content directly on the website, but the member must have an internet connection during access when using a browser.
The recommended access method is the Flux Player apps. The apps are available for all major platforms including Mac, Windows, iOS, Android, Kindle Fire, and Chromebooks. The app footprint is small and once signed-in, the content is available anytime the app is open. The content can also be downloaded in the Flux Player for offline use without losing the DRM control of the content.
The Flux Player apps are also available for streaming video and audio on AppleTV, FireTV, AndroidTV, and Roku.

The Flux Player and Web Player authenticate the member during login and then validates the license and use rights when the content is opened. Content added to a group is dynamically listed in a group members' device and content removed from a group is dynamically removed from the device, but you can also specify when and how long members will have access to each product.
The access and use rights in a group are determined by the license assigned to the group, the member expiration, if any, and the content start and end dates. Every access group has one associated DRM license that controls access of all group members to all products in the access group. This license can have an expiration, but the expiration is not required.
If the license includes a time span limitation (e.g.) a 6 month use period, the expiration is based on the date/time that the member joined the group. A license might include an optional fixed end date that would apply independent of the join date.
By defining the license, it is also possible to control all other rights to the content such as the ability to use the content on multiple devices, print, export, etc.
The group membership end date can be set individually per group member. You can set the member expiration when adding members or a later time.
It is also possible to set when the product will become available to a member and when it will no longer be available. The start and end dates can be absolute dates or relative to the days since the member joined the group.

The FlickRocket Admin Panel allows detailed tracking of all member's activities related to members and content such as:
Although access groups work perfectly fine without a shop, it can make sense to combine them with a shop to sell access to a group for a one-time payment. Depending on the license assigned to a group, the customer purchases time limited or permanent access to all content in the group and that content in the group can also be updated later.
You can set up a Group Access product just as you would any other digital product. The exception is that you will only set a price since the license is set when the group was created.

The product configuration page allows assignment of the group and member expiration options including no end date, a fixed end date, and a relative end date beginning a the date the member joins the group.

The resulting product will show in your shop catalog and can be purchased in a quantity of 1 or more to grant access to that number of members.

Note: If you want to charge recurring payments, you should use the FlickRocket subscription option instead.
The Access Group functionality is available under any plan, however under BASIC and SILVER, the Access Groups App needs to be purchased first. Also, not all features are available and certain limitations apply under the BASIC and SILVER plans. For details see our price list.
To use the Access Group feature, you will need to create at least one group, add content to the group, and add members.

Access Group members can be added in several ways; selling an Access Group product in your shop, importing a list, allowing members to sign-up themselves on a web page, redeeming a code, using Single Sign-On, or manually adding a member.

You can also set a member expiration date per user by clicking the number under the User(s) column on the Access Groups>Groups page or by setting the Expiration Date field on the Access Groups>Members page.
When using the list import feature, you will need to create the list in .csv format with the following fields in a header row: Email;Firstname;Lastname;Company


You can allow self-signup with restriction to a certain email domain or multiple domains. A code snippet is automatically created that can be embedded on a web page.
Choose Access Groups>Groups.
Click on the desired group.
In the Authorization section, choose Invite and self-signup
This option allows creating new group that allows self-signup in addition to list import and manual member addition. The self-signup can be restricted to certain domains by entering the domain that should be allowed. To use this option:
Click Save.

You can enable member control via an external Single-Sign-In (SSO) provider.
Choose Access Groups>Groups.
Click on the desired group.
In the Authorization section, choose Single-Sign-On Platform
This option allows membership control and access via an external SSO provider. To use this option:
Click Save.

You can sell group access as a product in your FlickRocket shop or most supported third-party stores.
To add a new Access Groups product:
Choose Products>All Products.
Click New product.
From the Product Type dropdown, select Access Group.
In the Access Group section, set the Available Groups dropdown to the desired group.
Set the desired End Date.
Configure the other product options such as product name, description, and price and click Save.
It should be noted that the delivery of a Group Access product as well as any other digital product is handled differently when the customer order quantity is greater than one (1). Adding the same digital product to a customer account multiple times would have no different appearance to the customer and would have little useful purpose. Instead of adding the customer as a member of the group, the customer is provided an unlock code. That code can be redeemed to add a number of members equal to the order quantity.
For example, if a customer orders a quantity of 5, the code can be redeemed 5 times. A different email address is required for each redemption resulting in 5 new group members.
When the customer clicks on the Group Access product on the My Content page, they will see the unlock code, a link to redeem the code to their own account, and a button to invite users. This is ideal for buyers or purchasing agents since they can make the purchase and forward the unlock code to those that will actually use the content.

Clicking the Invite User(s) button will display instructions that can be copied and forwarded or emailed to the user. The instructions will look similar to those below and will contain the link and login information the new group members or group admins will need to access the content.
Hello,

You have been invited to access content. To access the content, you will need to redeem the code below:

Code: ABCD-1234-AB12-34CD

To redeem the code:

1. Open a browser and go to "https://somedomain.com/unlock"
2. Enter the code exactly as it appears with dashes and click “Continue”.
3. If you already have an account with FluxPlayer, login with your account. (Only required if not already logged in). Otherwise, create a new account.
4. Follow the instructions on the page. Depending on your device and the content, you can use FluxPlayer app for your device or the browser-based online access.
Note: The FlickRocket Outlook Add-in can also be used to invite new members. See the documentation on the Outlook Add-in for more details.
The Organizations feature allows the creation of administrator accounts for an access group. Adding an Organization allows that Organization admin to manage group members only for that organization or company. This eliminates the need to create a separate group just that company or organization.
The Organization admin is a "super admin" and can do the following:
For example, consider a group with curriculum for 7th graders. An organization could be created for a school buyer and the buyer could invite teachers as admins. The teachers could then invite students as members and remove them when the content is no longer needed by that student.

Access Group members can be authenticated using an email and password or via a fixed IP range.
This is the default authentication method. Use this setting for members that will use their email and player password or SSO login.
The IP Range option is an advanced use option and should not be used without involvement of your IT administrator.
The IP Range authentication can be used with the fixed IP Range in a company or organization. When using this option, a login will not be required, however the user's IP address must be within the IP range and the number of concurrent users is limited.
Click Add to specify an IP address or range of IP addresses. You can edit or delete the IP addresses at anytime.
Set this to the number to limit the number of concurrent users. You monthly cost will be based on the number of concurrent users as well as the type and amount of content made available.
Quotes are available on request.
Access Groups supports the use of EXProxy for content access for libraries and other organizations.
Contact sales for more details.
Note: Once an Organization is created, the Authentication option cannot be changed.

Once an Organizer admin account has been created, an email is sent to the Organizer admin with a link and login credentials. After logging in, the Organization admin will see an option named New group user at the top of the page. The Organization admin can then invite new members to access group content or they can create Group admins who can access the group content and also invite other group members. The admin can also remove members on this page.

The instructions will look similar to those below and will contain the link and login information the new group members or group admins will need to access the content.
Hello,

You have been invited to access content. To access the content, you will need to redeem the code below:

Code: ABCD-1234-AB12-34CD

To redeem the code:

1. Open a browser and go to "https://somedomain.com/unlock"
2. Enter the code exactly as it appears with dashes and click “Continue”.
3. If you already have an account with FluxPlayer, login with your account. (Only required if not already logged in). Otherwise, create a new account.
4. Follow the instructions on the page. Depending on your device and the content, you can use FluxPlayer app for your device or the browser-based online access.
When creating group admins, you will also need to provide instructions to those admin on how they can create new group members.
Note: The FlickRocket Outlook Add-in can also be used to invite new members. See the documentation on the Outlook Add-in for more details .
An Organization admin can remove members or group admins they have added. A group admin can remove members they have added.

An Organization admin or Group admin can also create unlock codes for individual products.
For example, a teacher with a group admin role could create an unlock code with 15 activations (or actions) that would allow 15 students to redeem the code and unlock the content. The students would only have access to that product and of course any other content they may have a valid license to use.
To create an unlock code for a product:

Access Groups can contain any number of content items of any supported type. You can assign any product uploaded to FlickRocket as a content item to an access group. If content items are assigned to categories, these categories can be used to select content that should be added to a group and these categories are also used to categorize the content in the players.
When a new product is uploaded, this product can directly be added to one or more access groups on the product configuration page. You can also add products to a group by going to Access Groups>Groups and clicking on the number under the Product(s) header for the desired group. Then select the desired product and click Add.
The availability of each product to group members can be set individually by setting the startdate and/or enddate or by setting the available after days and delete after days fields. You can set these fields by clicking the number under the Product(s) column on the Groups page.
An email invitation is then sent to each member. Once the member has signed-in, the Status on the Members page will show as Confirmed. You can resend unconfirmed invitations by clicking on Unconfirmed and choosing Send email or you can resend to all unconfirmed members by clicking the Reinvite Unconfirmed button at the top of the Access Groups>Members page.
You can edit the different email notification templates for Access Groups at Company>Settings>Notifications.

The member status is shown under the Status column on the Access Groups>Members page. A Confirmed status indicates that the user has logged into the account since the invitation was extended. Clicking on the Confirmed status allows disabling a member's access without deleting the member from the group. If the member has been disabled, you can click on the status and choose Activate to enable access again for that member.
Unconfirmed status indicates that they have not yet logged in. You can resend unconfirmed invitations by clicking on Unconfirmed and choosing Send email or you can resend to all unconfirmed members by clicking the Reinvite Unconfirmed button at the top of the Access Groups>Members page.

Access Groups reports are available and can be generated at any time by choose Company>Reports and selecting the Groups tab. These reports include Confirmed members, Unconfirmed members, and several different usage reports.

The FlickRocket Add-In for Outlook can be used to manage group access directly within Outlook. The Add-in can be used in both the Outlook Web Client and Windows Desktop app.
See the documentation on the Outlook Add-in for more details .