This quick guide explains the basic function of the Flickrocket Digital Distribution (DRM) plugin for Wordpress/WooCommerce.
The extension requires the following to be installed:
The FlickRocket plugin for Wordpress/WooCommerce is installed by using the regular WooCommerce process for installing plugins.
This chapter describes the plugin settings in the WooCommerce admin interface.
The general settings are configured under WooCommerce / Settings / Flickrocket.
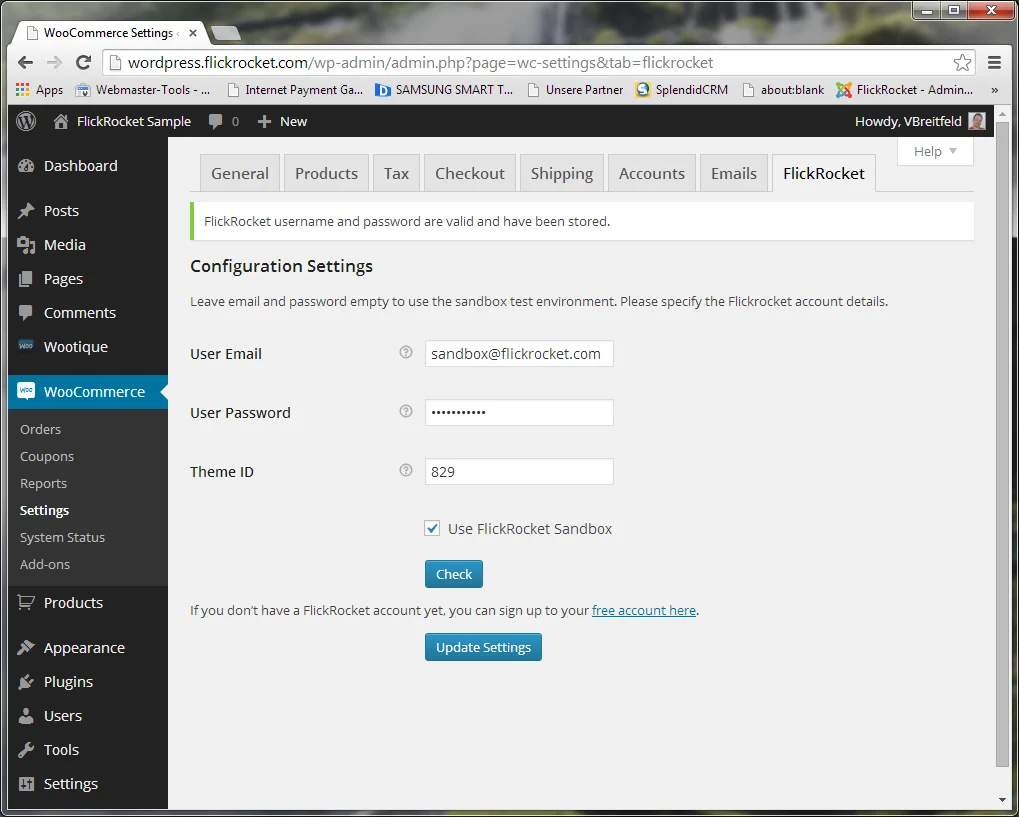
To use the plugin, you need to login with your Flickrocket's account email/password. Once you have done this, you have access to the following settings:
Domain
This is one of your shop domains in Flickrocket. It is important that you use a "Plugin" theme for the selected domain. Only a "Plugin" theme integrates seamlessly with Woocommerce because it doesn't include Flickrocket shop elements.
Ongoing Sync
If this setting is active, any new product upload or changes to products in the Flickrocket system will automatically by synced to your WooCommerce shop.
Auto Activate
If this setting is active, products synced from Flickrocket will automatically be activated. If you want to edit product data before products go live in your shop, you should not mark this checkbox.
Show Previews
If this setting is active, existing previews for your products are made accessible in the WooCommerce shop. Depending on the content type of the product and your upload settings, Flickrocket automatically creates previews or allows you to upload manually created previews.
Admin email
The admin email receicves important notifications, e.g. if an order process with the Flickrocket backend could not be completed.
Don't forget to click "Update Settings" to save the selections you have made.
There are multiple ways to add Flickrocket based products to your WooCommerce store
Upload new products (and automatically sync)
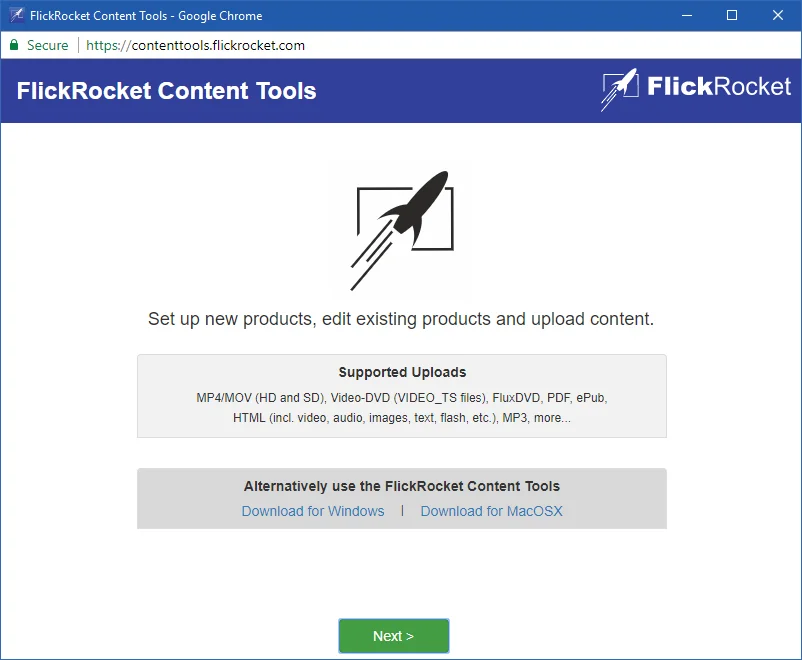
To upload new products go to Products -> Digital Content and click the "Product Upload Wizard" button.
The Upload Wizard guides you through the complete product upload. If you want to use automatic or manual sync to create the corresponding WooCommerce product, it is recommended that you enter all the data that you will also want in your WooCommerce shop. This includes cover picture, name, description, license and pricing information.
To sync products that already exist in your Flickrocket account to WooCommerce, you need to go to Products -> Digital Content.
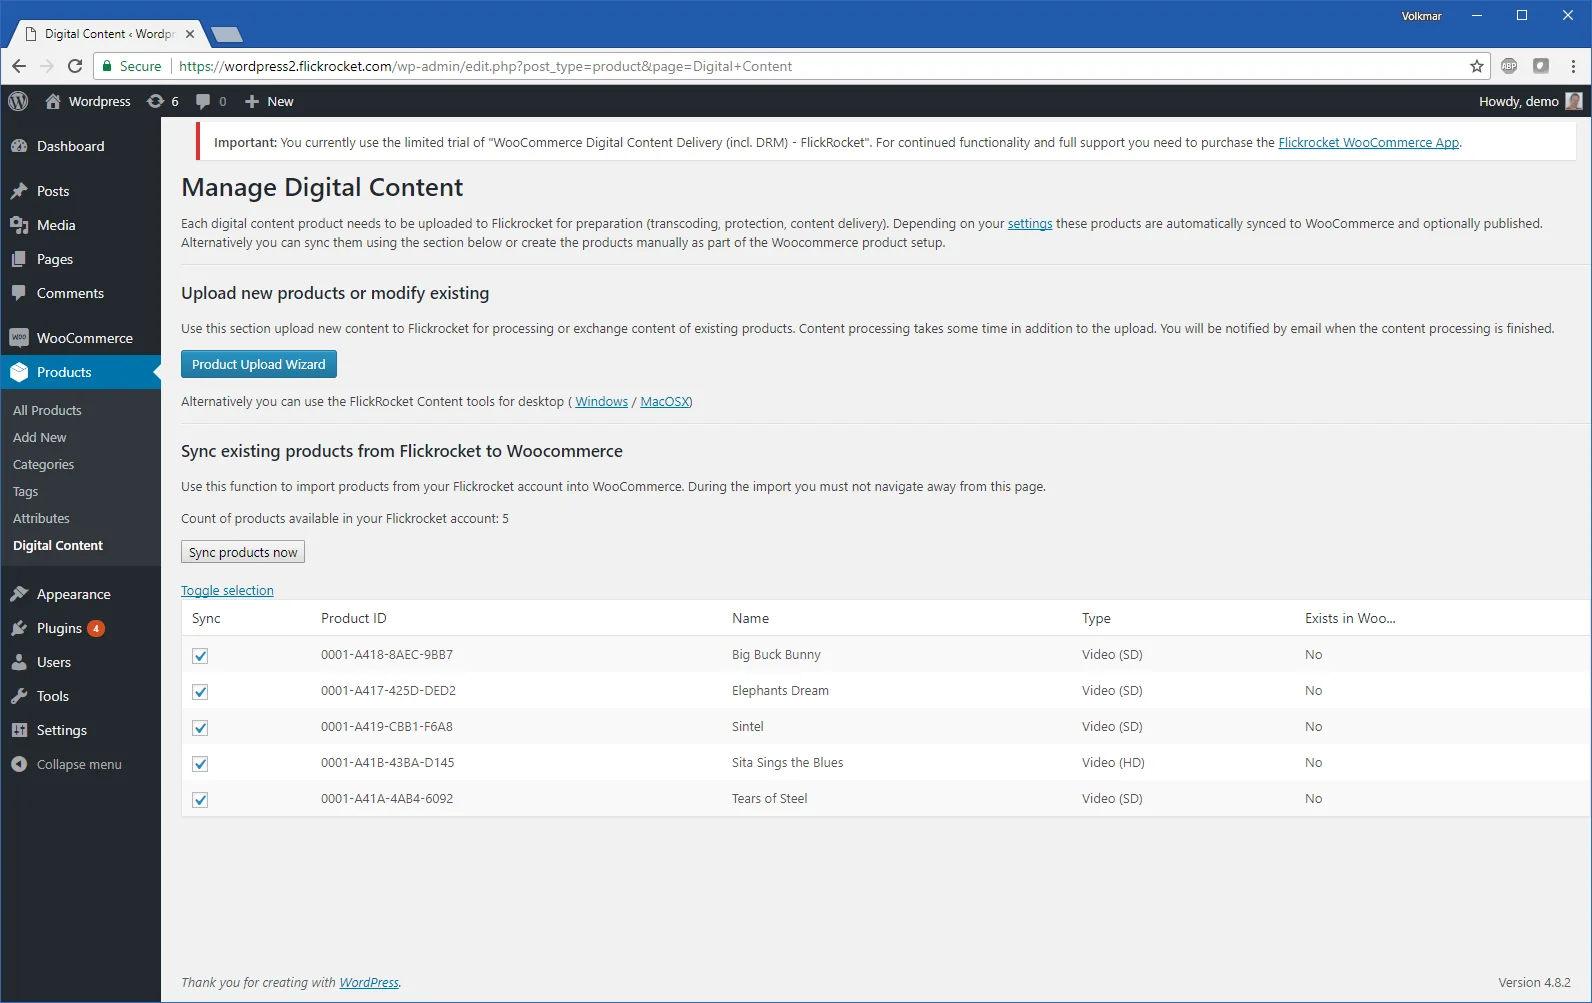
You need to select the products you want to sync and then click the "Sync products now" button. You'll see a progress and the products will be created in WooCommerce.
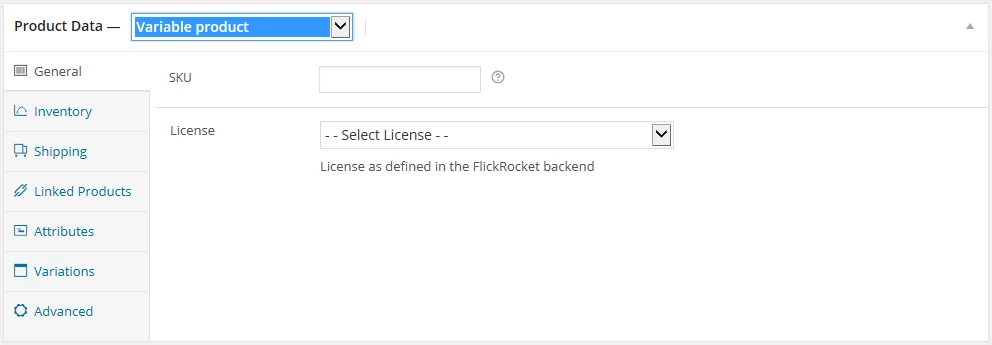
To manually create a simple product you use the normal WooCommerce -> Products -> Add Product function to create a new Simple Product and make sure to select Virtual and Flickrocket but don’t check Downloadable. Also you need to select the License and optionally (depending on the product type) the quality for the content.
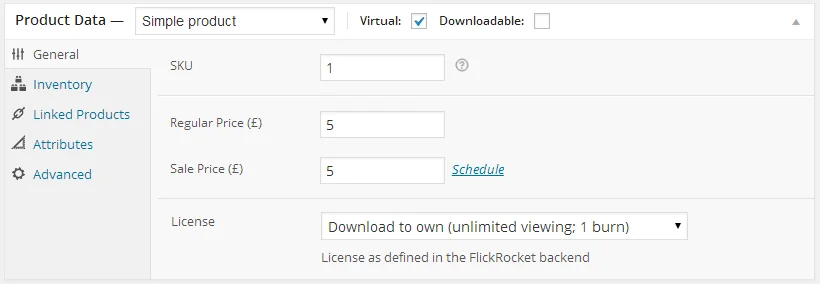
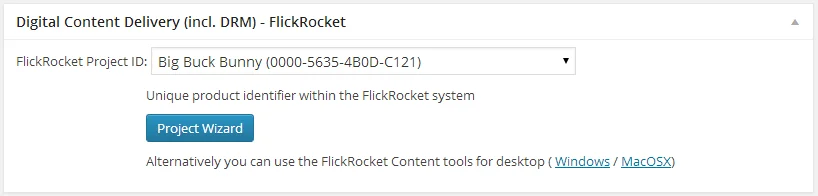
In addition you need to select the underlying FlickRocket product for the new WooCommerce product.
To manually create a variable product you use the WooCommerce -> Products -> Add Product function.
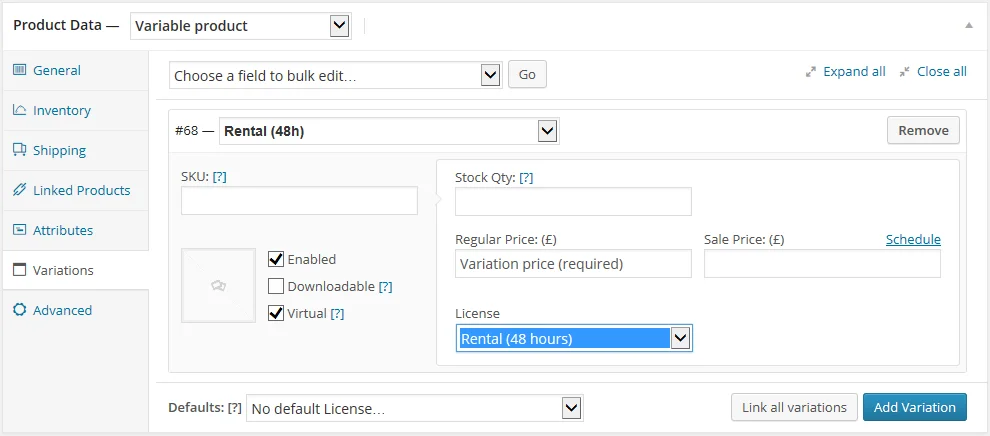
Now you need to create an attribute called “License” and write the texts for the options between which the customer can select in the field “Value(s)” - separated by a ”|” character. In our example, the customer will be able to select between a “Rental (48h)” and a “Download-to-own (permanent license + 1 burn)” license.

Don’t forget to select the “Visible on product page” and “Used for variations” checkboxes and click “Save attributes” before you continue.
In the next step you select Variations and click Add Variation for each license you have entered in the Value(s) field under Attributes. For each variant, check Virtual, select the corresponding Attribute Value in the top line and select the associated FlickRocket license under License.
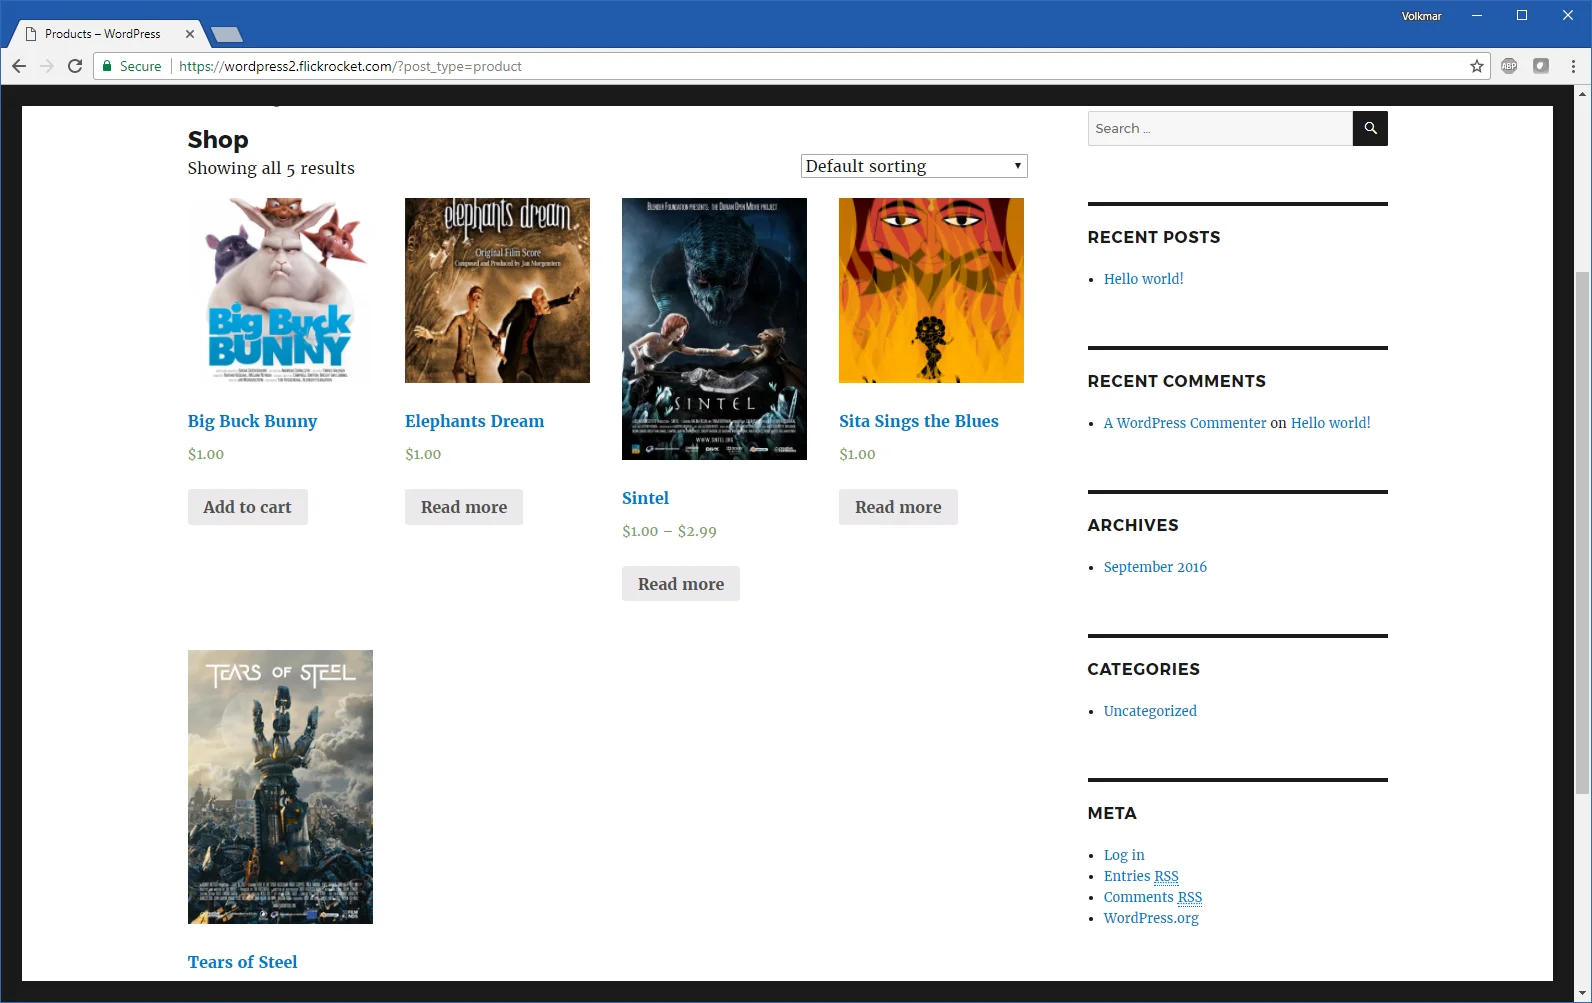
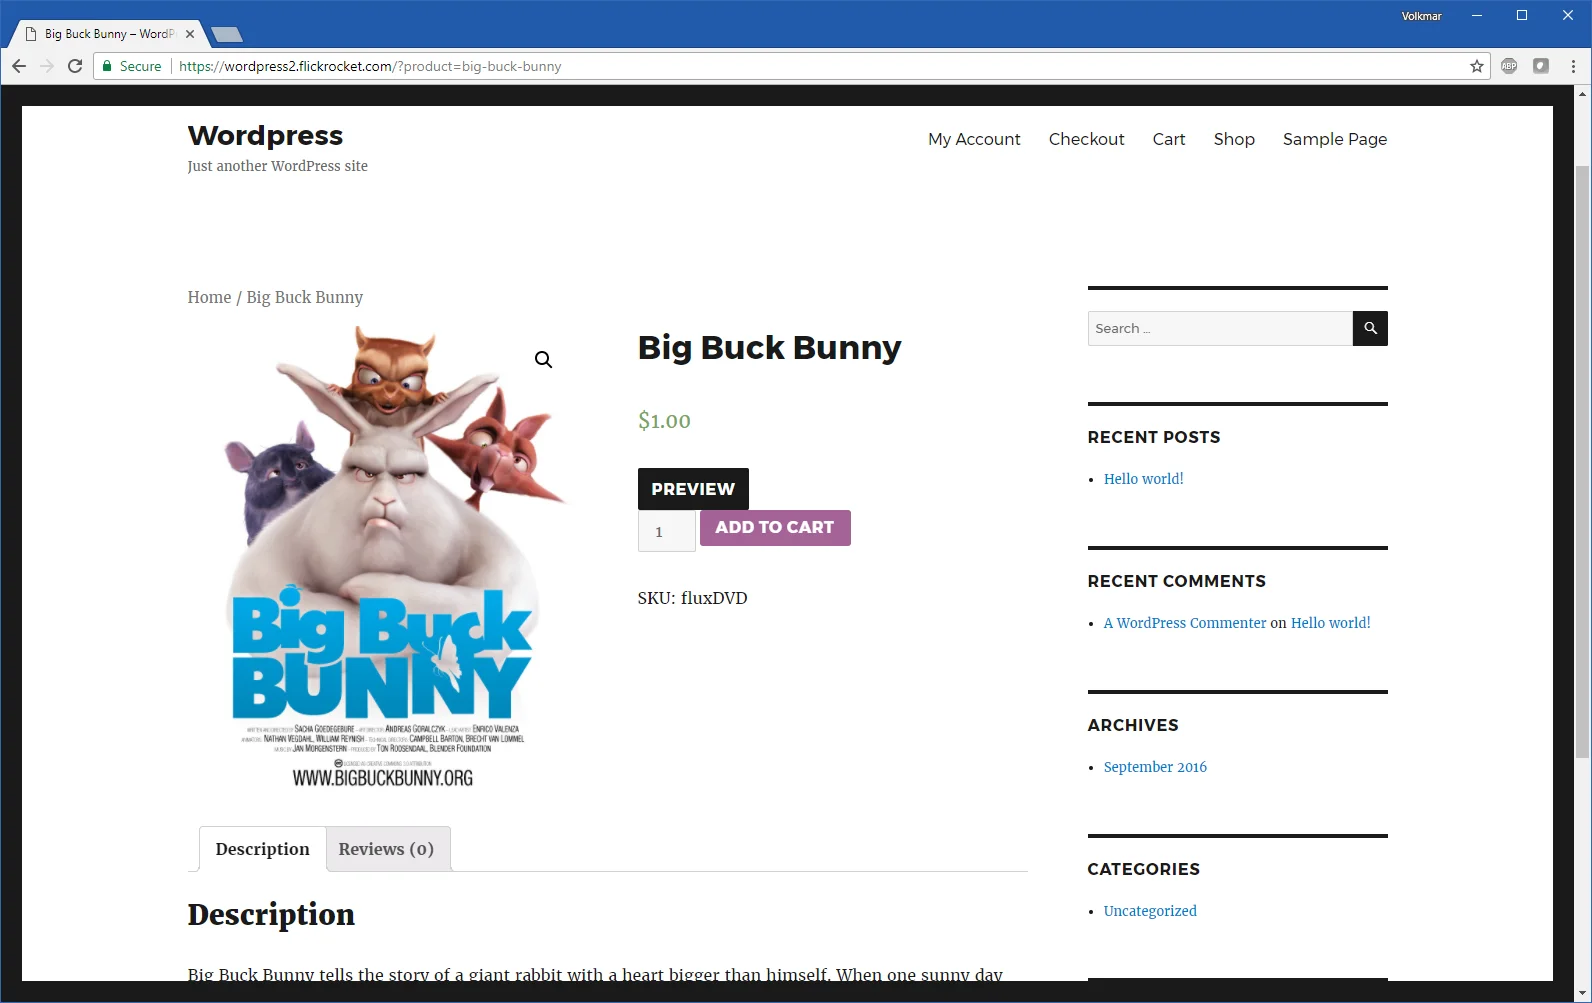
Digital products are displayed in the shop the same way as any other products. If you sell a product with different licenses (e.g. rental or permanent), the customer needs to select the license to purchase.
After the customer completes the purchase, the "My Account" section shows all the information needed to access the digital product.
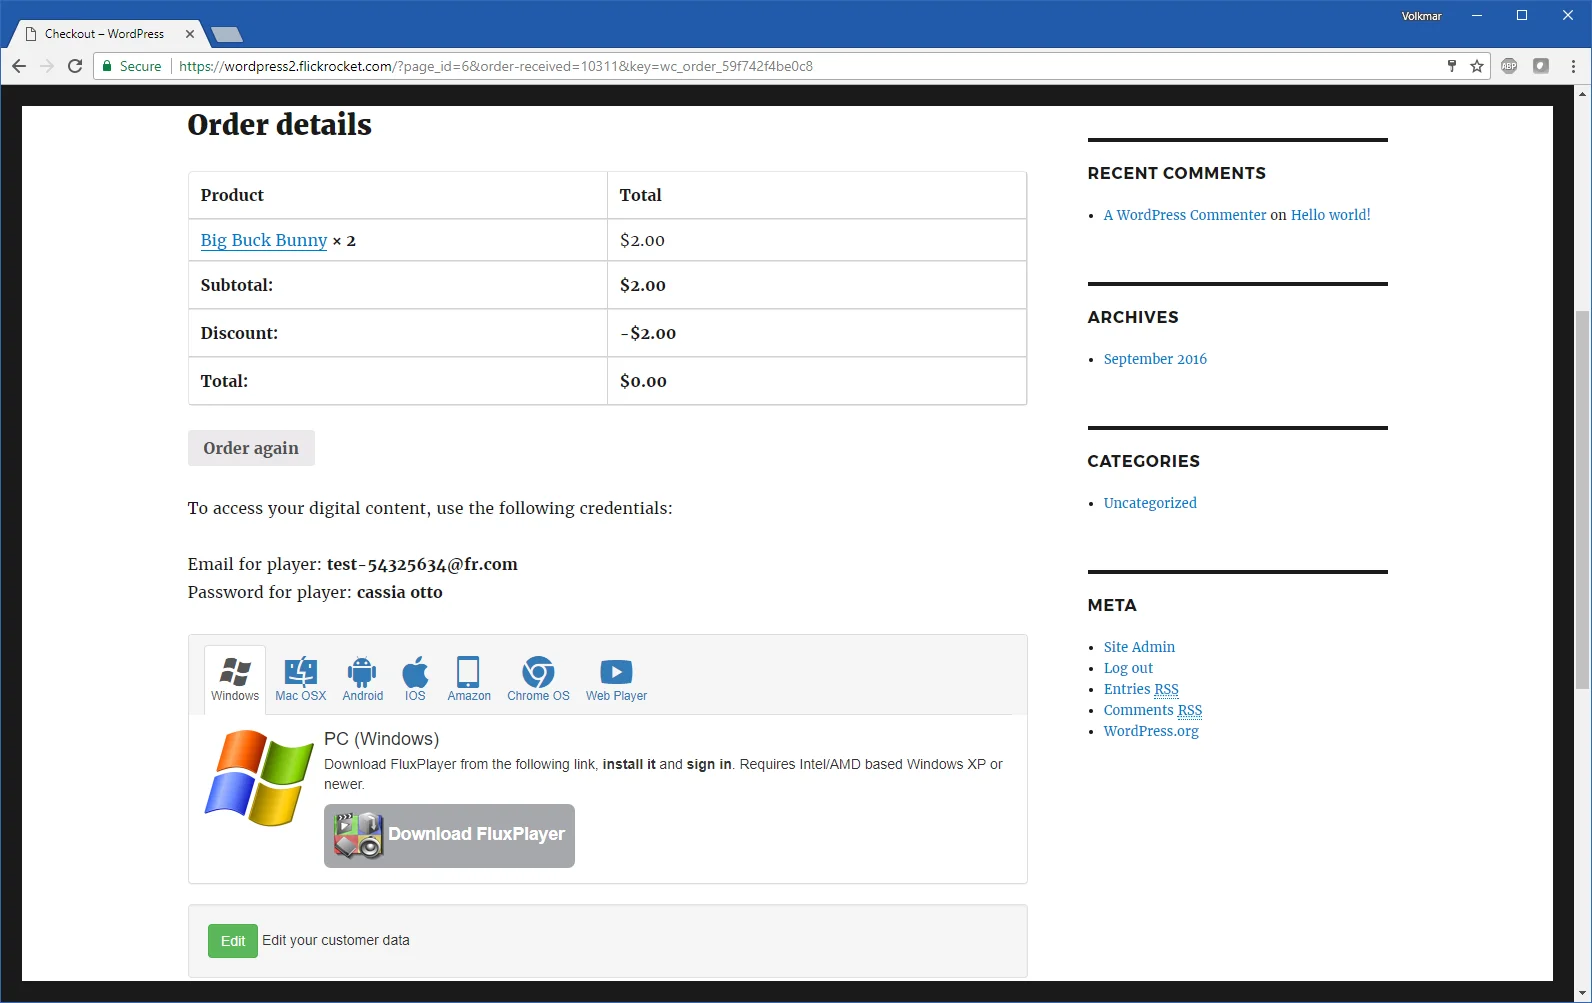
In addition, the customer receives an email with his account and access information.